
Building strong, muscular forearms is not just about aesthetics; it is a fundamental requirement for improving your grip strength, protecting your wrists from injury, and enhancing your performance in sports like climbing, tennis, and weightlifting. While many people rely on heavy barbells or dumbbells for arm training, resistance bands offer a highly effective, portable, and joint-friendly alternative. The continuous tension provided by elastic resistance challenges your muscles throughout the entire range of motion, targeting deep stabilizing fibers that are often missed by free weights.
Using resistance bands for forearm training allows you to work in multiple planes of motion, including rotation, which is difficult to replicate with traditional iron weights. Whether you are working out in a compact apartment in Singapore, at a local fitness corner, or in a commercial gym, a simple set of bands can provide all the resistance needed to stimulate muscle growth and joint resilience. By understanding how to manipulate band tension and execute key movements with precise form, you can build a comprehensive forearm routine that fits seamlessly into any training schedule.
Selecting the Right Band Tension and Setting Up Safely
To begin training your forearms effectively, you must first select the appropriate band tension. Forearm muscles, such as the brachioradialis, pronator teres, and various wrist flexors and extensors, are relatively small compared to the larger muscle groups of the upper body. Consequently, they do not require massive amounts of resistance to trigger adaptation. Starting with a light to medium loop band or a thin, flat therapy band is highly recommended. Using a band that is too heavy will inevitably lead to compensation, forcing your shoulders, biceps, or upper back to take over the movement and reducing the effectiveness of the exercise.
Products mentioned in this guide

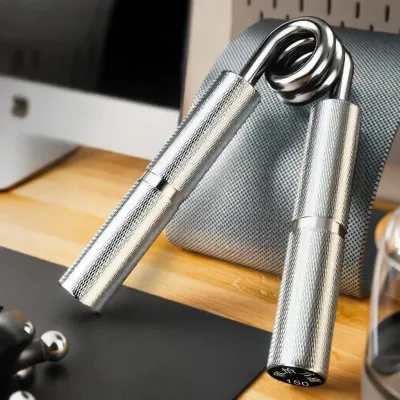
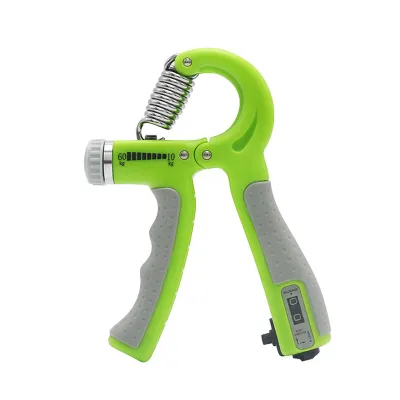
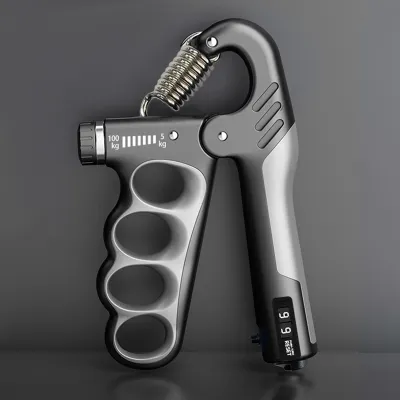
Prices are valid at publication and may change. Please refer to the product page for the latest price.
Establishing a secure anchor point is the next critical step in your setup. For most seated forearm exercises, your own foot serves as the safest and most convenient anchor. Simply place the band flat under the arch of your shoe, ensuring your foot is planted firmly on the ground so the band cannot slip out. If your exercise requires a horizontal pull, utilize a high-quality door anchor. Always place the anchor on the hinge side of a solid door and pull the door completely shut, locking it if possible. Give the band a few firm test tugs before initiating any exercise to verify that the anchor is stable and will not release mid-set.
Before every training session, take a moment to inspect your resistance bands for any signs of wear and tear. Look closely for micro-tears, small punctures, discoloration, or dry rot along the entire length of the rubber. In warm, humid climates like Singapore, latex and thermoplastic elastomer (TPE) materials can degrade more rapidly if they are stored in damp gym bags or exposed to direct sunlight. A band that snaps under tension can cause painful welts or facial injuries. If you detect any physical imperfections or if the band feels unusually brittle, discard it immediately and replace it with a fresh one.
Mastering Wrist Flexion and Extension Movements
The foundation of forearm development lies in mastering wrist flexion and extension, which target the muscles on the underside and top of your lower arm, respectively. To perform the banded wrist curl (flexion), sit comfortably on a chair or bench with your feet flat on the floor. Loop one end of a resistance band under your foot and grasp the other end with an underhand grip (palm facing upward). Rest your forearm flat along your thigh, allowing your wrist to extend slightly past your knee. Keeping your forearm pressed firmly against your leg, slowly curl your wrist upward toward your body, squeezing your forearm muscles at the peak of the movement. Lower your hand back down under strict control, taking a full two to three seconds to resist the band’s pull during the eccentric phase.

To balance this movement and protect your wrist joints from overuse injuries, you must also perform the banded reverse wrist curl (extension). Maintain the same seated position on your bench, but rotate your forearm so that your palm faces downward toward the floor. Grasp the band securely and, keeping your forearm pinned to your thigh, lift the back of your hand toward the ceiling by extending your wrist. You will immediately feel the muscles on the top of your forearm engage. Because the wrist extensors are generally weaker than the flexors, you may need to use a lighter band or allow more slack in the band to complete this movement with a full range of motion.
Maintaining pristine form is essential during both flexion and extension exercises to ensure the target muscles are doing the work. A common error is allowing the elbow to lift off the thigh, which recruits the biceps and shoulders to assist in moving the resistance. Keep your elbow and forearm completely stationary, acting as a stable pivot point. Additionally, avoid shrugging your shoulders or leaning your torso backward to generate momentum. If you find yourself swinging your body or flaring your elbows outward to complete a repetition, the resistance is too high. Reduce the tension immediately to keep the focus entirely on the wrist joint.
Building Grip and Rotational Strength
True forearm strength requires more than just moving the wrist up and down; it also demands robust grip strength and rotational stability. To target the intrinsic muscles of your hands and improve your crushing grip, you can perform banded finger extensions. Wrap a small, high-resistance loop band around the outside of your fingers and thumb, keeping them bunched close together. Slowly expand your hand outward, spreading your fingers as wide as possible against the elastic resistance. Hold this fully open position for a brief second to maximize tension, then slowly return to the starting position. This exercise is highly beneficial for balancing the constant gripping actions performed during daily life and heavy lifting.
Rotational strength is trained through pronation and supination, which involve twisting the forearm inward and outward. To set up for these movements, anchor your band at a low point near the floor or step on one end of it. Grasp the free end of the band with your hand in a neutral position, as if you were holding a hammer with your thumb pointing upward. To train pronation, rotate your wrist inward so that your palm faces the floor, pulling against the resistance of the band. To train supination, reverse the direction, rotating your wrist outward so your palm faces the ceiling. These twisting motions strengthen the deep muscles around the elbow and wrist joints, which are critical for throwing, swinging a racket, or turning a doorknob.
You can easily customize the difficulty of these exercises by adjusting your hand placement and how the band is wrapped. If a band feels too light but you do not want to switch to a heavier one, simply wrap the excess material around your hand once or twice. This shortens the active length of the band, which increases the starting tension and makes the movement significantly harder. Conversely, holding the band closer to its end or stepping closer to the anchor point will decrease the tension, allowing you to focus on high-quality movement patterns and joint mobility.
Structuring Your Routine and Progressing Safely
To achieve balanced forearm development and avoid chronic strain, you must structure your training routine thoughtfully. A well-rounded program should feature an equal volume of flexion and extension exercises. Many fitness enthusiasts make the mistake of overtraining their wrist flexors because they are naturally stronger, while completely ignoring the extensors. This imbalance can pull the wrist joint out of its optimal alignment, leading to discomfort and reduced grip performance over time. Aim to perform the same number of sets and repetitions for both sides of the arm to maintain structural harmony.
Progressive overload is just as important for your forearms as it is for your chest or legs, but it must be applied with caution. Because the wrist joints are delicate, progress should be gradual. You will know it is time to increase the resistance when you can complete three sets of fifteen repetitions with perfect form, a full range of motion, and minimal muscle burning. To progress, you can transition to a slightly thicker band, shorten the band’s active length, or step further away from your anchor point. Always prioritize movement quality over the amount of resistance; a heavier band is useless if your range of motion is cut in half.
The timing of your forearm training within your overall workout session is crucial for safety and performance. Always perform direct forearm and grip isolation work at the very end of your training session, particularly after upper-body workouts or heavy pulling movements. Your grip serves as a primary link in compound exercises like deadlifts, pull-ups, and rows. If you pre-fatigue your forearms with isolated band work at the beginning of your session, your grip will likely fail prematurely during those larger lifts, compromising your safety and limiting the stimulation of your larger muscle groups.
Avoiding Common Mistakes and Recognizing Stop Conditions
When training the forearms with resistance bands, avoiding common technique errors is paramount to preventing injury. One of the most frequent mistakes is allowing the wrist to collapse or hyperextend uncontrollably at the end of a movement. The elastic nature of resistance bands means they pull back hardest at the peak of contraction. If you lose control during this phase, the band can violently yank your wrist into an extreme angle, straining the delicate ligaments and tendons. Ensure that every repetition is performed with a slow, deliberate tempo, maintaining active muscular control from start to finish.
It is also vital to learn how to distinguish between productive muscle fatigue and potentially harmful joint strain. During a high-repetition forearm set, you should expect to feel a deep, warm, and diffuse burning sensation throughout the muscle bellies. This is normal metabolic stress and indicates that the target muscles are working effectively. However, if you feel a sharp, pinching, hot, or highly localized pain directly inside the wrist joint, along the side of the elbow, or running down the fingers, this is a clear warning sign of joint or tendon irritation.
Establishing strict stop conditions will protect you from long-term overuse injuries like tendonitis. If you experience any sharp pain, clicking sounds accompanied by discomfort, or numbness in your hands during an exercise, stop the movement immediately. Do not attempt to push through the pain, as this can turn a minor strain into a chronic issue. Rest the affected arm, apply ice if necessary, and avoid any activities that aggravate the joint. If the pain or discomfort persists for more than a few days, or if it interferes with your daily activities, consult a physical therapist or a qualified medical professional for a proper assessment.
Frequently Asked Questions (FAQ)
Can resistance bands build forearm muscle size or just endurance?
Yes, resistance bands can build muscle size (hypertrophy) when used correctly. Muscle growth is driven by mechanical tension and proximity to muscular failure, regardless of the tool used. To stimulate hypertrophy, adjust the band tension so that you reach near-failure within a moderate repetition range, such as eight to fifteen reps, rather than performing endless high-repetition sets that only build endurance.
How often should I train my forearms with bands?
Because the forearms are highly active in daily tasks and other upper-body exercises, they recover quickly but can easily be overworked. Training them directly two to three times per week is generally sufficient for most fitness levels. Adjust this frequency based on your overall training volume; if your main workouts already involve heavy gripping, you may only need one or two dedicated forearm sessions to see progress.
Community discussion
Share your experience or ask a question. Comments are reviewed before publication.