
Using a chalkless grip product during resistance band workouts is an excellent way to maintain control, prevent sudden slips, and protect your hands from friction burns. Unlike traditional powder chalk, which creates a dusty mess and can degrade latex over time, chalkless grip formulas rely on liquid, gel, or spray bases that dry into a clean, high-friction barrier. To use these products effectively, you must start with clean hands and equipment, apply a thin and even layer, allow it to dry completely, and adapt your hand placement to match the tension of your exercises. By mastering these steps, you can focus entirely on your form and muscle engagement without worrying about a snapping band.
Preparing Your Hands and Resistance Bands
Before applying any grip aid, your hands must be completely free of oils, sweat, and dirt. Wash your hands thoroughly with basic soap and warm water, avoiding moisturizing soaps that leave a hydrating film behind. Dry your hands completely with a clean towel, paying close attention to the spaces between your fingers and the webs of your thumbs where moisture tends to linger.
Next, inspect your resistance bands. Dust, sweat residue, and environmental oils can accumulate on the surface of latex or thermoplastic elastomer (TPE) bands, making them naturally slick. Wipe the bands down with a clean, dry cloth to remove surface dust. While doing this, perform a safety check by stretching the bands slightly under a bright light to look for micro-tears, discoloration, or brittle spots that could lead to a sudden snap under tension.
Products mentioned in this guide
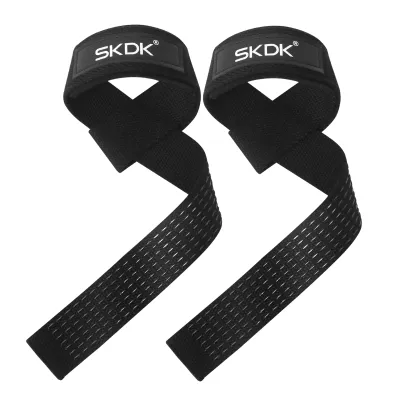
Prices are valid at publication and may change. Please refer to the product page for the latest price.
Finally, review the manufacturer instructions on your chalkless grip packaging. Because formulations vary—some using alcohol bases, others relying on silica or specialized polymers—it is vital to check for specific skin preparation steps. If you are using a new product for the first time, perform a small patch test on your inner forearm to ensure you do not experience redness, itching, or irritation before applying it to your entire hand.
Step-by-Step Application Techniques
Achieving the perfect grip starts with dispensing the correct amount of product. For liquid or gel formulas, start with a small, pea-sized drop in the center of one palm. It is always easier to add a tiny bit more later than to deal with an excess pool of liquid that takes too long to dry. If you are using a spray-on grip aid, hold the bottle about fifteen centimeters away from your palm and apply a single, light mist across the gripping surface of each hand.

Once the product is on your skin, rub your hands together quickly to distribute it evenly. Spread the formula across your palms, down the length of each finger, and thoroughly into the thumb webs where the resistance band often rests during pressing movements. Avoid rubbing your hands excessively once the product begins to tack up or dry, as this can cause the formula to pill or flake off, reducing its overall effectiveness.
Allow the product to dry completely before you touch your resistance bands. This drying phase typically takes between fifteen and thirty seconds, depending on the ambient humidity and the specific formula. Watch for visual cues: many liquid grip products turn from a glossy wet sheen to a matte, chalky white or translucent finish as they dry. You can also test the surface by gently touching your fingertips together; they should feel dry, slightly textured, and highly slip-resistant. Touching the bands while the product is still wet can transfer the liquid to the rubber, creating a slippery barrier instead of a secure grip.
Adjusting Your Grip for Different Resistance Band Exercises
Different movement patterns place unique demands on your hands, requiring you to adapt your grip style even when using a grip aid. For pulling exercises such as bent-over rows, lat pulldowns, or band pull-aparts, the primary risk is the band sliding out of your fingers as tension increases. To counter this, focus the application of your chalkless grip on the pads of your fingers and the upper palm. Use a closed grip where your fingers fully wrap around the band, securing the tail end under your thumb to lock the material in place.
For pushing or pressing movements, such as chest presses or overhead presses, the band tends to roll or shift across the meat of your palm. This shifting can cause friction discomfort or uneven resistance. For these exercises, ensure the grip product is thoroughly applied to the heel of your hand and the web between your thumb and index finger. Keep your wrists straight and allow the band to rest flat against the palm rather than letting it bunch up, which maximizes the surface area contact between the grip aid and the band.
The thickness and shape of your bands also dictate your grip choice. Thin, flat loop bands are highly prone to rolling and require a full, active wrap where your hand constantly squeezes the material. Thicker, heavy-duty resistance bands or tube bands with handles may allow for a hook grip, where your fingers act as hooks and the thumb rests alongside them. Always match your grip pressure to the resistance level; higher resistance requires a more active, conscious squeeze, even with a high-quality grip aid assisting you.
Managing Sweat and Reapplication During Workouts
As your workout intensity rises, sweat will naturally begin to challenge your grip. In warm or humid training environments, such as a home gym setup without air conditioning, monitoring your hands becomes even more critical. Watch for early signs that the grip layer is breaking down, such as a slight sliding sensation during the peak tension phase of an exercise, or a shiny, wet appearance on your palms. If the band begins to slip even slightly, pause your set immediately to prevent injury.
Before reapplying any chalkless grip product, you must prepare the skin surface again. Simply layering new product over a mixture of sweat and old grip aid will create a pasty, slippery barrier that compromises safety. Use a clean gym towel to pat your hands completely dry, removing as much moisture and loose residue as possible.
Once your hands are dry, apply a very small amount of the grip product—usually about half of your initial dose—to refresh the high-friction barrier. The frequency of reapplication depends on your personal sweat rate and the humidity of your workout space. For a standard forty-five-minute session, a single reapplication halfway through is often sufficient, but you should always prioritize tactile feedback over a set schedule.
Post-Workout Cleaning and Equipment Maintenance
Proper post-workout care protects both your skin health and the longevity of your training equipment. Once your workout is complete, wash your hands immediately with warm water and a mild soap. Most chalkless grip products are formulated to wash away easily with standard soap, but you may need to gently scrub your palms with a washcloth to remove any stubborn, textured residue. After washing, apply a light moisturizer to restore hydration, as many grip aids contain drying agents that can lead to cracked skin if left on for extended periods.
Your resistance bands also require attention after every session. Sweat, body oils, and transferred grip residue can degrade latex and TPE over time, causing the material to become brittle or sticky. Wipe down the contact points of the bands with a clean microfiber cloth dampened with plain water. Avoid using harsh chemical cleaners, dish soaps, or alcohol-based wipes on the bands, as these substances can strip the protective oils from the rubber and accelerate cracking.
Allow the bands to air dry completely in a shaded area before storing them. Store your resistance bands in a cool, dry drawer or bag, away from direct sunlight, heat sources, and sharp objects. Prolonged exposure to ultraviolet (UV) light and high temperatures can weaken the molecular bonds of the rubber, significantly reducing the lifespan of your bands and increasing the risk of a dangerous snap during future workouts.
Troubleshooting Common Grip and Slippage Issues
If you find that your hands are still slipping despite using a chalkless grip product, the most common culprit is overapplication. Applying too much liquid or gel creates a thick, wet layer that cannot dry properly, acting as a lubricant rather than a friction enhancer. If this happens, wash your hands completely, dry them, and start over with a fraction of the amount you previously used.
Another factor to consider is the material of your resistance bands. While chalkless grip products work exceptionally well on standard latex and TPE bands, some bands feature specialized smooth coatings or are made of fabric blends that interact differently with grip aids. If your band has a glossy, non-porous finish, the product may not adhere well, requiring you to rely more on mechanical grip adjustments or to switch to a textured band.
Safety must always come first during resistance band training. If you experience persistent slippage that you cannot resolve through reapplication or cleaning, stop the exercise immediately. A slipping band can snap back with significant force, causing painful welts, facial injuries, or loss of balance. Inspect both your hands and the band for any oily residue, clean them thoroughly, and do not resume training until you can guarantee a completely secure hold.
Frequently Asked Questions (FAQ)
Can I use chalkless grip on fabric resistance bands?
Fabric resistance bands generally rely on their woven texture and built-in silicone inner strips to stay in place. Applying liquid or paste chalkless grip products to fabric bands is not recommended, as the liquid can soak into the fibers, clogging the weave and degrading the silicone strips. Always check the band manufacturer’s care instructions, and rely on the natural texture of the fabric or wear clean, textured workout gloves if you need additional grip support.
Is chalkless grip safe for sensitive skin or open blisters?
Because ingredients vary widely across different brands, you should always read the product label carefully to check for potential allergens, alcohol content, or skin irritants. Do not apply chalkless grip products directly to open wounds, torn calluses, or fresh blisters, as the ingredients can cause severe stinging and delay the healing process. Instead, cover any damaged skin with protective athletic tape or a specialized blister bandage before starting your workout.
How does chalkless grip compare to traditional lifting chalk for band workouts?
Traditional powder chalk is highly effective at absorbing moisture, but it creates a fine dust that can settle into home gym spaces and dry out rubber or latex bands, making them brittle over time. Chalkless grip products offer a much cleaner alternative, drying into a dust-free barrier that does not leave a messy residue on your floor or equipment. Additionally, because chalkless formulas do not contain abrasive loose particles, they are gentler on the surface of latex bands, helping to preserve their elasticity and texture.
Community discussion
Share your experience or ask a question. Comments are reviewed before publication.