
Swimming efficiency relies heavily on maintaining a horizontal body position in the water. For many swimmers, the legs naturally sink due to muscle density or improper kick mechanics, creating substantial drag that slows forward progress. A pull buoy swimming tool solves this issue by isolating the upper body, allowing you to neutralize your kick and focus entirely on refining your stroke mechanics or building upper body endurance. By placing this foam flotation device between your thighs, you can experience the sensation of a high, streamlined body position without the exhausting effort of continuous kicking.
However, selecting the right pull buoy is not a one-size-fits-all decision. The market offers a variety of shapes, sizes, and material densities, each designed to support different training objectives and body types. Choosing a model that does not match your physical build or training goals can lead to poor swimming habits, lower back discomfort, or inefficient workouts. To make an informed choice, you must evaluate how different buoyancy levels, ergonomic profiles, and material specifications align with your personal swimming objectives.
Define Your Swim Training Goals: Technique vs. Strength
Before browsing online marketplaces or local sports shops, you must define what you want to achieve during your pool sessions. Swim training generally splits into two primary focuses: technical refinement and strength development. Your primary goal directly dictates the level of buoyancy and the physical shape of the pull buoy you require.
Products mentioned in this guide
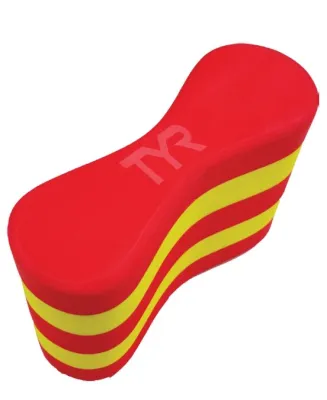
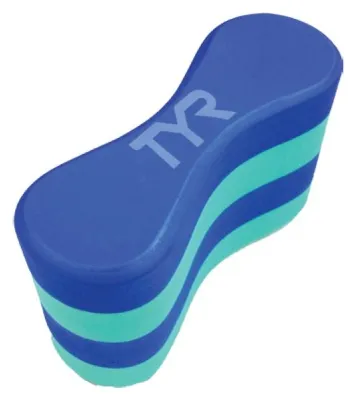

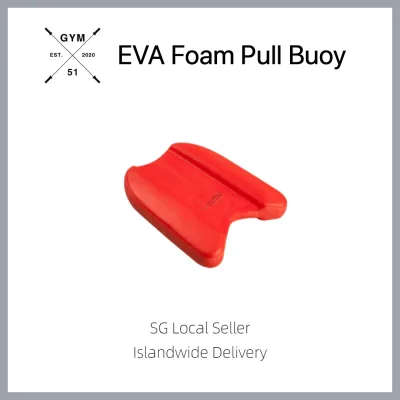
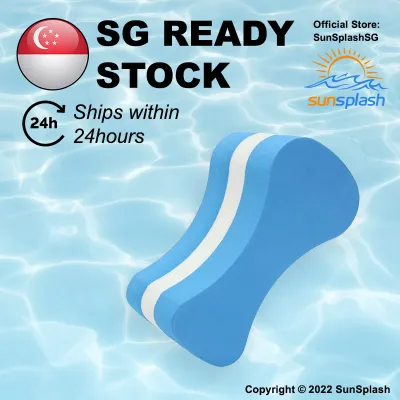
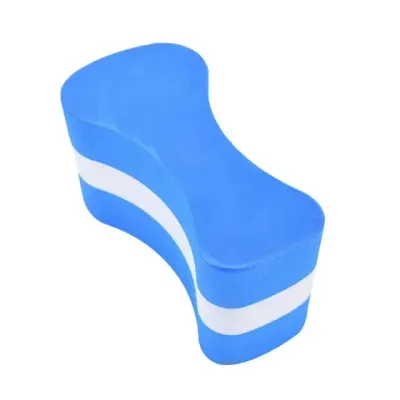
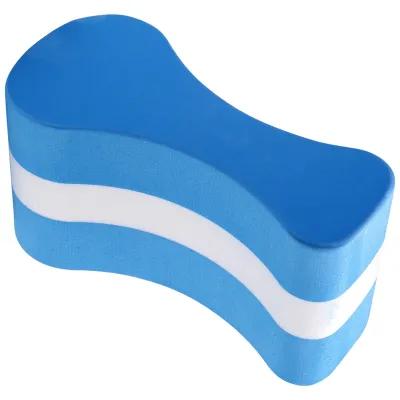
Prices are valid at publication and may change. Please refer to the product page for the latest price.
If your primary focus is technique, you should look for a pull buoy that offers moderate buoyancy. The goal of technique training is to mimic a natural, efficient body position. A buoy that provides too much lift will push your hips unnaturally high, creating a downhill slope that does not represent real-world swimming conditions. Moderate buoyancy allows you to focus on core engagement, hip rotation, and stroke timing. It helps you identify flat spots in your body roll and encourages you to keep your head down and your spine aligned. This is particularly useful for triathletes and open-water swimmers who need to transition their pool training directly to natural water environments.
Conversely, if your training phase emphasizes building upper body strength and shoulder endurance, a high-buoyancy pull buoy is more appropriate. Strength-focused sets often involve pulling heavy loads, such as when training with hand paddles or ankle bands. When you eliminate the kick entirely and add resistance to your hands, your lower body naturally wants to sink. A high-buoyancy buoy provides the necessary upward force to keep your legs horizontal, allowing you to channel all your energy into high-torque shoulder and back movements. This isolation ensures that your upper body muscles reach the desired level of fatigue without your swimming form collapsing due to sinking legs.
To assess which goal to prioritize, consider your current skill level and training cycle. If you find yourself struggling with stroke symmetry, crossing over at the entry, or maintaining a consistent catch, prioritize technique with a moderate-buoyancy tool. If your stroke mechanics are stable but you lack the endurance to maintain your pace over longer distances, transition to strength-focused sets with a more supportive buoy.
Core Features to Check Before You Buy
When evaluating different pull buoy swimming options, you should look beyond basic aesthetics and focus on the physical attributes and material specifications listed by the manufacturer. Because you will be squeezing this piece of equipment between your thighs for thousands of meters, material quality and surface texture directly impact your comfort and the gear’s lifespan.

First, verify the material density and quality of the Ethylene-Vinyl Acetate (EVA) foam. High-quality EVA foam is closed-cell, meaning it does not absorb water. When reviewing product specifications, look for terms indicating high-density or molded construction. Low-density foam can become waterlogged over time, which reduces its buoyancy and makes it a breeding ground for mold. Additionally, high-density foam offers superior resistance to pool chemicals like chlorine and bromine. In warm, humid climates, pool chemicals can degrade cheap foam rapidly, causing it to crumble or lose its structural integrity within a few months of regular use.
Second, examine the surface texture and finish of the buoy. Pull buoys generally come in either a smooth, glossy finish or a matte, textured finish. While a smooth finish might look sleek, it can become slippery when wet. This slipperiness forces you to grip the buoy tightly with your inner thighs, which can lead to muscle cramping and distract you from your stroke. A matte or lightly textured surface provides mechanical friction against your swimwear, keeping the buoy securely in place with minimal physical effort. This secure grip is essential for preventing thigh chafing, which is a common complaint during long, high-volume swim sets.
Finally, pay attention to the shape variations available. The traditional figure-8 design is symmetrical and widely available, but modern manufacturers also offer asymmetrical and highly contoured ergonomic designs. Asymmetrical designs feature one end that is wider or thicker than the other, allowing you to adjust the level of lift by simply flipping the buoy. Ergonomic designs are sculpted to match the natural curvature of your inner thighs, providing a more secure fit and reducing the risk of the buoy slipping out during flip turns.
Sizing and Buoyancy: Matching the Gear to Your Body
Selecting the correct size of a pull buoy is critical to maintaining proper spinal alignment in the water. Buoyancy is a function of volume; a larger pull buoy displaces more water and therefore provides more upward force. You must match this upward force to your body weight, leg muscle mass, and natural buoyancy.
To find the right match, start by checking the manufacturer’s sizing charts, which often correlate buoy dimensions with user weight ranges or skill levels. Swimmers with higher muscle density or lower body fat in their legs—common among runners and triathletes—typically require a larger buoy to counteract the natural sinking tendency of their lower limbs. Conversely, younger swimmers, smaller-framed individuals, or those with naturally buoyant legs should opt for smaller sizes.
Using a pull buoy that is too large for your body size introduces significant biomechanical risks. Excessive buoyancy forces your hips and lower back too high, causing hyperextension of the lumbar spine (an exaggerated arch in your lower back). Over time, swimming in this hyperextended position puts immense pressure on your lower back vertebrae, leading to soreness, muscle spasms, and potential long-term injury. It also disrupts your natural body roll, making it difficult to rotate your hips effectively during the stroke.
On the other hand, a pull buoy that is too small will fail to provide adequate flotation. If the buoy sinks under your leg weight, your hips will drop, creating a sagging body position. This drag defeats the primary purpose of using a pull buoy, as you will be forced to perform micro-kicks to keep your legs horizontal, preventing true upper-body isolation. If you find yourself constantly squeezing your legs together or kicking slightly to keep the buoy afloat, it is a clear sign that you need to step up to a larger size or a higher-density model.
Pull Buoy Profiles: Which Type Fits Your Needs?
To help you narrow down your choices, pull buoys can be categorized into three distinct profiles based on their shape, buoyancy characteristics, and intended user groups. Understanding these profiles allows you to select a tool that matches your specific physical needs and training environment.
Profile A: Standard Figure-8
The standard figure-8 pull buoy is the classic training tool found in almost every swim bag. It features a symmetrical design with two rounded ends and a narrower center channel. This profile is highly versatile and serves as an excellent starting point for beginners who are just learning to isolate their upper body. Because it is symmetrical, there is no correct or incorrect way to insert it, making it simple to use during fast-paced swim sets. It provides a balanced, predictable level of lift that suits a wide range of body types. While a standard pull buoy is highly affordable, typically costing between S$15 and S$30, selecting the wrong model can lead to poor swimming habits.
Profile B: Asymmetrical and Ergonomic
Asymmetrical and ergonomic pull buoys are designed for advanced swimmers and those who engage in high-volume training. These buoys feature one end that is noticeably wider or more bulbous than the other. By placing the wider end facing downward, you can generate more lift under your thighs, which is highly beneficial for swimmers with heavy legs. Flipping the wider end upward provides a different feel, supporting the upper pelvic region. The ergonomic contouring conforms closely to the shape of your thighs, significantly reducing friction and the risk of painful chafing during long distance sets.
Profile C: High-Buoyancy and Contoured
This profile is specifically engineered for strength isolation and swimmers with significant lower-body mass. These buoys are typically larger in volume and constructed from ultra-dense EVA foam to maximize water displacement. They are ideal for advanced athletes who train extensively with hand paddles, as the extra lift offsets the downward force generated by high-torque pulling motions. This profile ensures that your body remains in a perfect horizontal plane even when your legs are completely inactive.
To help you compare these options, the table below outlines the key differences across these three profiles:
| Profile Type | Primary Use Case | Relative Buoyancy Level | Fit Security | Target Swimmer |
|---|---|---|---|---|
| Standard Figure-8 | General training, basic body alignment | Moderate | Standard | Beginners to intermediate swimmers |
| Asymmetrical / Ergonomic | High-volume technique drills, custom lift | Adjustable (Moderate to High) | High (Contoured fit) | Intermediate to advanced swimmers |
| High-Buoyancy / Contoured | Strength building, heavy leg support | High | High | Advanced swimmers, triathletes |
Safe Usage and Common Mistakes to Avoid
While a pull buoy swimming tool is an excellent aid, it must be used correctly to prevent injury and ensure that your training translates to faster, unassisted swimming. Because swimming is a highly repetitive sport, minor technical errors when using training gear can quickly escalate into chronic physical strain. Equipment cannot replace proper training, physical conditioning, or professional coaching.
Proper placement is the first step to safe usage. The pull buoy should be placed high up between your thighs, close to your groin. Placing the buoy lower down, such as between your knees or calves, increases the leverage on your lower back and pelvis. This extended lever arm makes it incredibly difficult to control your body roll and forces your core muscles to work in an unnatural, strained manner. Keep the buoy high, and focus on keeping your legs relaxed but extended straight behind you.
Another common mistake is allowing the pull buoy to lock your hips flat in the water. Efficient swimming requires your hips and shoulders to rotate together along your longitudinal axis. When using a pull buoy, you must actively engage your core muscles to rotate your hips side-to-side with each stroke, rather than keeping your lower body completely flat. Failing to rotate your hips forces your shoulders to do all the work, which can lead to shoulder impingement and rotator cuff strain.
You must also establish clear stop conditions for your training. If you experience lower back pain, sharp shoulder discomfort, or neck strain during a pull set, stop using the buoy immediately. These symptoms indicate that either the buoy is the wrong size, your body alignment has collapsed, or your muscles are too fatigued to maintain safe form.
Finally, maintain a healthy balance in your workouts. It can be tempting to use a pull buoy for the majority of your swim session because it makes swimming feel easier and faster. However, over-relying on a buoy can weaken your core muscles and cause your natural kick to become lazy and uncoordinated. As a general rule, limit pull buoy sets to no more than 30% to 40% of your total workout volume, ensuring you spend plenty of time practicing full-stroke swimming to integrate your upper-body strength with a natural, active kick.
Frequently Asked Questions (FAQ)
Can I use a pull buoy if I am a beginner?
Yes, beginners can use a pull buoy, but only after establishing basic water comfort, breathing rhythm, and full-stroke competency. If you are still struggling to breathe comfortably or maintain a basic horizontal position without panic, introducing an isolation tool can complicate your learning process. Once you can swim a continuous lap of the pool, you can introduce a standard figure-8 pull buoy for short distances, such as 25 to 50 meters at a time. This helps you experience what a high, streamlined body position feels like, which you can then try to replicate during your normal swim sets.
How do I clean and store my pull buoy?
To maximize the lifespan of your pull buoy, rinse it thoroughly with fresh, cool water after every pool session. This simple step removes residual chlorine, salt, and other pool chemicals that can slowly break down the EVA foam. After rinsing, allow the buoy to air-dry completely in a well-ventilated, shaded area. Never leave your pull buoy in direct sunlight, as UV rays will degrade the foam, causing it to become brittle, crack, and lose its buoyancy. Additionally, avoid storing a damp buoy inside a closed, dark swim bag, as this creates an ideal environment for mold and mildew to grow.
Community discussion
Share your experience or ask a question. Comments are reviewed before publication.