
Using a resistance band bar is one of the most efficient ways to build upper body strength without the space requirements of traditional free weights. By combining the progressive tension of elastic bands with the stable, familiar grip of a barbell, this versatile tool allows you to perform a wide range of strength exercises right at home. To get the most out of your workouts, you must master the correct setup, maintain proper joint alignment, and control the resistance through every phase of the movement.
Unlike traditional weights that rely on gravity, resistance bands provide continuous tension that increases as the band stretches. This unique resistance profile challenges your muscles differently, requiring constant stabilization and core engagement. Whether your goal is to tone your muscles, build strength, or improve your functional fitness, understanding how to safely and effectively manipulate this equipment is key to achieving consistent progress.
Setting Up Your Resistance Band Bar and Workspace
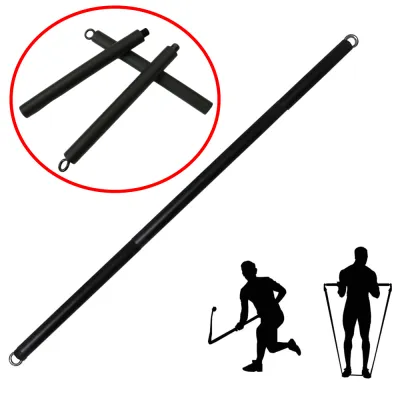
Before you begin any exercise session, a thorough inspection of your equipment is essential to prevent sudden failures or injuries. Examine the resistance bands along their entire length, looking closely for any tiny cracks, discoloration, peeling, or micro-tears. Inspect the bar itself, paying close attention to the welded loops, end caps, and the foam or rubber grip for any signs of structural wear.
Products mentioned in this guide
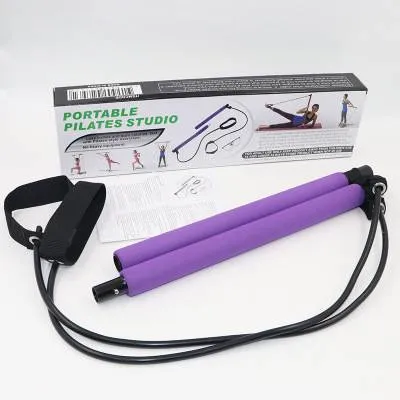
Prices are valid at publication and may change. Please refer to the product page for the latest price.
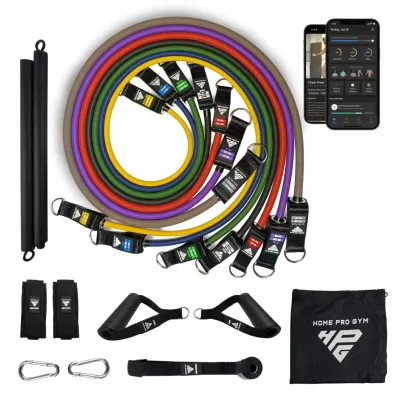
Next, verify that all connection hardware is fully secured. If your system uses carabiners, threaded quick-links, or heavy-duty clips, ensure they are completely closed and locked according to the manufacturer’s instructions. A loose clip can slip under tension, causing the band to snap back unexpectedly. If your bar features a multi-piece screw-together design, tighten the joints firmly so there is no play or wobbling in the shaft.
Preparing your physical environment is just as important as checking your gear. Clear a dedicated workout space on the floor, removing any loose rugs, toys, or cables that could cause you to lose your footing. Check your overhead clearance by raising your arms fully; ensure you are well clear of ceiling fans, light fixtures, or low door frames. If you are exercising on a slick surface like tile or polished wood, consider using a non-slip exercise mat to secure your stance.
Finally, select the appropriate anchoring method for your chosen exercises. For standing movements, you will step directly onto the bands, ensuring they are centered under the arches of your feet and flat against the soles of your shoes. For movements requiring a horizontal pull, secure the band to a heavy-duty door anchor. Always place the anchor on the hinge side of a solid, fully closed door, and pull in the direction that keeps the door pulled shut against the frame.
How to Perform Resistance Band Rows
The resistance band row is an exceptional movement for targeting the major muscles of your back, including the latissimus dorsi, rhomboids, and rear deltoids. To begin, stand with your feet shoulder-width apart, stepping securely over the middle of the resistance band. Hold the bar with an overhand grip, keeping your hands slightly wider than shoulder-width apart.

Hinge forward at your hips while keeping your knees slightly bent and your spine completely neutral. Your chest should be lifted, and your shoulders should remain pulled back and down, avoiding any tendency to slouch or round your lower back. This hip-hinge position protects your lumbar spine and positions your torso at the optimal angle to engage your back muscles.
Initiate the rowing motion by pulling your shoulder blades back and squeezing them together. Only after this initial retraction should you bend your elbows, drawing the bar smoothly toward your lower ribs. Keep your elbows tucked close to your body rather than flaring them outward, which helps isolate the back muscles and reduces strain on the shoulder joints.
Once the bar reaches your torso, pause for a brief second to maximize muscle contraction. Then, slowly lower the bar back to the starting position over a count of two to three seconds. Controlling this eccentric phase is crucial, as resisting the band’s natural pull is highly effective for building muscle strength and control.
Stop the set immediately if you experience common form breaks, such as rounding your lower back, shrugging your shoulders toward your ears, or using momentum to jerk your torso upward. If you cannot complete a repetition with a slow, controlled tempo, the resistance is too high. Reduce the tension by stepping closer to the center of the band or switching to a lighter band.
Executing Bicep Curls with a Band Bar
Isolating your biceps with a resistance band bar requires strict attention to elbow position and movement speed. Start by standing tall with your feet placed firmly on the center of the band. Spreading your feet wider apart will stretch the band further, increasing the starting tension, while a narrower stance will make the movement slightly easier.
Grip the bar with an underhand grip, meaning your palms should face upward, spaced shoulder-width apart. Position your elbows slightly forward and pin them firmly against the sides of your torso. Keeping your elbows locked in this position prevents your front shoulders from taking over the movement, ensuring that your biceps do the majority of the work.
Exhale as you curl the bar upward toward your chest, moving only your forearms. Your wrists should remain straight and rigid throughout the entire movement; do not allow them to bend backward under the tension of the band. Focus on squeezing your biceps hard at the top of the movement, where the band’s resistance is at its peak.
The lowering phase of a bicep curl is where many lifters lose tension. Because the band pulls back forcefully as it shortens, you must actively resist this downward pull. Lower the bar slowly and smoothly until your arms are fully extended, maintaining constant muscular engagement throughout the entire range of motion.
If you find that the resistance feels uneven or too heavy at the very top of the curl, adjust your setup. You can slide your hands slightly wider on the bar or narrow your stance on the floor. Ensuring a smooth, progressive resistance curve allows you to stimulate the muscle effectively without straining your wrists or elbows.
Performing Overhead Presses Safely
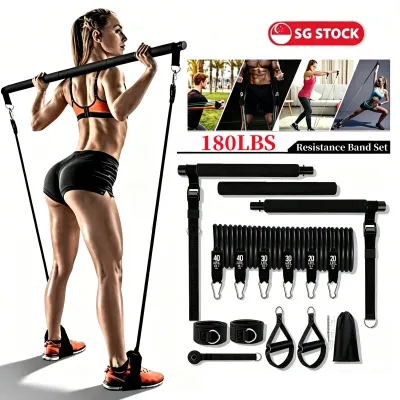
The overhead press is a highly effective compound exercise for building shoulder strength and stability, but it requires careful core control to protect your lower back. To set up, stand with your feet shoulder-width apart on the band, holding the bar at collarbone height with an overhand grip. Your hands should be positioned just outside your shoulders.
Before you begin the press, brace your core muscles tightly and squeeze your glutes. This creates a solid, stable foundation and prevents your pelvis from tilting forward, which can cause your lower spine to arch excessively under load. Keep your chest proud and your head slightly tilted back to clear a path for the bar.
Press the bar straight up toward the ceiling, extending your arms fully without locking out your elbows aggressively. As you press, keep your elbows tucked slightly forward at a 45-degree angle rather than flaring them straight out to the sides. This alignment keeps your shoulder joints in a safer, more natural path of motion.
At the top of the movement, your arms should be aligned directly over your ears, with the bar positioned over your mid-foot. If you find yourself leaning backward or pushing the bar forward rather than straight up, the resistance is likely too heavy. Switch to a lighter band or step on the band with only one foot to reduce the tension.
Lower the bar back to your collarbone with complete control, resisting the downward pull of the band. Avoid letting the bar drop quickly, which can place sudden, jarring stress on your neck and shoulder joints. Keep your core braced until the bar is safely returned to the starting position.
Structuring Your Upper Body Routine
To build a balanced and effective upper body routine, you should structure your sets, repetitions, and rest periods based on your specific fitness goals. If your primary goal is muscular endurance and joint stability, aim for 3 sets of 15 to 20 repetitions using a lighter band. If you are focusing on muscle growth and strength, target 3 to 4 sets of 8 to 12 repetitions with a thicker band.
Rest intervals are essential for managing fatigue and maintaining high-quality form across all sets. Rest for 60 to 90 seconds between sets of the same exercise. Because resistance bands provide continuous tension without any dead spots, your muscles may experience a deep burn and fatigue more rapidly than they would with traditional dumbbells.
Progressing your workouts does not always require buying heavier bands. You can increase the difficulty by adjusting your grip width, widening your stance to stretch the band further, or slowing down the tempo of each repetition. For example, performing a row with a three-second pulling phase and a four-second lowering phase significantly increases the time under tension, stimulating more muscle growth.
Always listen to your body’s feedback during your workouts. While a deep muscular burn is normal, any sharp, sudden, or localized pain in your joints, tendons, or lower back is a clear signal to stop. Modify the exercise by reducing the resistance, adjusting your stance, or substituting the movement entirely to ensure your training remains safe and sustainable.
Frequently Asked Questions (FAQ)
How do I know when to increase the resistance level?
You are ready to progress to a heavier band when you can complete all of your planned sets and repetitions with perfect form while feeling that you could still perform two or three more repetitions at the end of each set. Additionally, if you notice that the band feels slack or provides almost no resistance at the beginning or peak of the movement, it is time to transition to a thicker band or shorten the band’s active length.
Can I use a resistance band bar for chest exercises?
Yes, you can perform chest presses and chest flyes using a resistance band bar. To set up a chest press, loop the band behind your upper back, holding the bar in front of your chest, or secure the band to a door anchor at chest height while facing away from the door. While the rigid bar provides excellent stability for pressing movements, it does limit the natural converging path of your hands, so focus on keeping your wrists straight and your shoulders packed back.
How should I clean and store the band bar after use?
After each workout, wipe down the metal bar and foam grips with a damp cloth to remove sweat, oils, and dirt; avoid using harsh chemical cleaners or solvents, which can degrade the foam or rubber materials. Store your resistance bands in a cool, dry place away from direct sunlight, moisture, and extreme temperatures. Prolonged exposure to UV rays and heat can cause latex and fabric bands to become brittle, dry out, and eventually snap during use.

Community discussion
Share your experience or ask a question. Comments are reviewed before publication.