
Using a compact outdoor pump like the FlexTail Tiny Pump 3X can streamline your preparation for camping trips, pool days, and outdoor adventures. This lightweight tool is designed to replace manual blowing, saving time and energy when setting up sleep systems or recreational gear. To get the most out of this device, you must understand how to select the correct nozzle, establish a secure seal, and operate the pump within its safe physical limits.
By mastering the proper setup and inflation techniques, you can protect your outdoor equipment from damage and extend the operational life of your pump. Whether you are preparing a sleeping pad for a night in the wilderness or inflating water toys for a day at the beach, following a structured approach ensures efficient performance every time.
Preparing Your Pump and Checking Safety Boundaries
Before connecting the pump to any inflatable, verify the battery charge level using the built-in indicator light. Operating a pump with a low battery can result in sudden shutoffs mid-inflation, which may leave your gear partially filled. Inspect the outer casing and ports for any dirt, sand, or debris that might have accumulated during storage, as particles drawn into the motor can cause internal damage.
Products mentioned in this guide
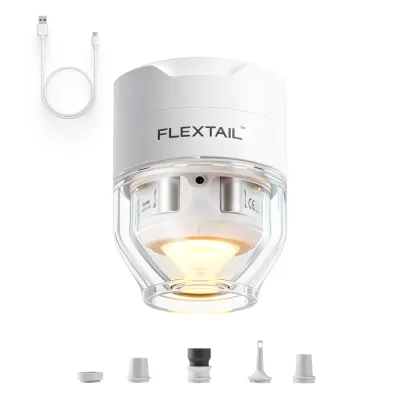
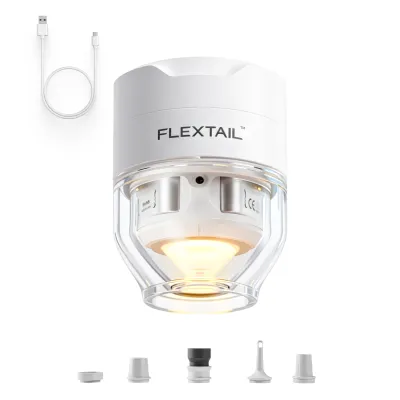
Prices are valid at publication and may change. Please refer to the product page for the latest price.
Consult the manufacturer’s instruction manual to identify the maximum continuous run time for your specific pump model. Micro-pumps rely on compact motors that generate heat quickly during operation. Running the device beyond its recommended continuous limit can lead to overheating, which risks damaging the internal circuitry and melting plastic components.
It is equally important to understand the pressure limitations of both the pump and your inflatable gear. This device is engineered for high-volume, low-pressure applications, making it ideal for sleeping pads and pool toys but unsuitable for high-pressure items. Attempting to inflate gear beyond the pump’s maximum pressure capability can strain the motor, drain the battery rapidly, and fail to achieve the desired firmness.
Matching Nozzles to Inflatable Valves
Achieving an airtight seal is the most critical factor in efficient inflation. The pump comes with a selection of nozzle attachments designed to fit various valve styles. Before turning on the motor, take a moment to compare the shape and diameter of your inflatable’s valve with the available nozzles to find the closest match.

Press the selected nozzle firmly into the pump’s inflation port, ensuring it sits flush and secure. When inserting the nozzle into the inflatable’s valve, check that the fit is snug enough to prevent air from escaping around the edges. A loose connection forces the pump to work harder and significantly increases the time required to fill the item.
Air Mattresses and Sleeping Pads
Camping mattresses and sleeping pads typically feature specialized valves designed to prevent air from escaping when the pump is disconnected. Common styles include flat valves, push-button valves, and proprietary double-lock mechanisms. Select the nozzle that matches the inner diameter of these valves to ensure a secure connection.
When inflating a sleep system, monitor the firmness by gently pressing your hand against the mattress surface. Because sleeping pads require a balance of support and comfort, stop the inflation process before the material becomes completely rigid. Over-inflating can strain the welded seams of the mattress, especially when your body weight is applied later in the night.
Pool Floats and Water Toys
Pool floats and beach toys often utilize traditional pinch valves, which feature a small internal flap to block backflow. To inflate these items, you must use a tapered nozzle that is long enough to bypass or push open this internal flap. Without proper insertion, the air will simply bounce off the closed flap, causing the pump to strain without filling the toy.
Managing large air volumes requires patience, as high-volume floats take longer to fill than compact camping gear. If you are inflating a multi-chamber float, fill each section incrementally rather than inflating one chamber to maximum capacity first. This distributed approach prevents uneven tension on the internal vinyl walls and helps maintain the structural shape of the float.
Camping Gear and Specialty Items
Smaller specialty items, such as inflatable travel pillows, seat cushions, or dry bags, require a delicate touch. These low-volume items fill almost instantly due to their small capacity. Use the smallest compatible nozzle and prepare to turn off the pump immediately to avoid sudden over-inflation.
Some technical outdoor gear utilizes unique valve designs that may require you to hold the nozzle in place manually during operation. If the nozzle does not lock into the valve, maintain steady pressure with your hand to keep the seal airtight. This prevents the backpressure from pushing the nozzle out of the valve as the item nears full capacity.
Step-by-Step Inflation Workflow
To ensure a smooth and safe inflation process, follow this sequential workflow for every item you inflate:
- Select and Connect the Nozzle: Choose the nozzle that matches your valve type. Press it firmly into the pump's side inflation port, then insert it securely into the inflatable's valve to establish a tight, leak-free seal.
- Power On the Device: Activate the pump using the manufacturer's designated power sequence, which often requires a double-press or a long-press to prevent accidental activation in your pack. Listen to the motor's pitch; a steady, high-pitched hum indicates normal airflow.
- Monitor Temperature and Sound: Keep an eye on the pump's body to ensure it does not become excessively hot to the touch. If the motor's pitch drops significantly or sounds strained, it may indicate a blockage or that the item has reached its maximum inflation capacity.
- Assess Firmness Manually: Periodically press down on the inflatable with your hand to check the pressure. Stop the pump just before the material reaches maximum rigidity to allow room for physical use and temperature-induced air expansion.
- Disconnect and Seal: Turn off the pump first, then quickly pull the nozzle out of the valve. Immediately close the valve cap or plug to minimize any minor air loss that occurs during the transition.
Deflation Techniques and Post-Use Care
Efficient deflation is just as important as inflation, especially when packing up camp in a hurry. Check your pump to see if it features a dedicated deflation port, which is typically located on a different side of the device than the inflation port. Connecting your nozzle to this deflation port allows the motor to actively draw air out of your gear.
Active deflation helps remove the residual air pockets that make folding difficult. Once the air is fully extracted, fold your sleeping pads or pool floats along their natural seams. Avoid creating sharp, tight creases in the same spots repeatedly, as this can weaken the material over time and lead to pinhole leaks.
Proper storage of both your gear and the pump is essential for long-term durability. In warm, humid climates like Singapore, ensure all inflatables are completely dry before folding them to prevent mold and mildew growth. Store the pump in a cool, dry place away from direct sunlight, and charge the battery to approximately half capacity before long periods of non-use to preserve battery health.
Troubleshooting Common Inflation Issues
If you notice air leaking from the connection point during inflation, turn off the pump and re-evaluate your nozzle selection. A nozzle that is too small will allow air to escape around the sides, while one that is too large will not sit deep enough in the valve. Adjust the insertion depth or try a different attachment from the kit to secure a tighter fit.
If the pump shuts off unexpectedly during use, it is likely due to either battery depletion or the activation of an internal thermal protection sensor. Let the device cool down completely in a shaded area before attempting to restart it. If it still fails to power on, connect it to a power source to verify if the battery needs recharging.
When an inflatable seems to lose air quickly after setup, the issue is usually with the valve seating or a physical puncture rather than the pump itself. Inspect the valve cap to ensure it is fully pressed in and sealed. If the leak persists, apply a mild mixture of soapy water to the seams and surface of the inflatable; escaping air will create visible bubbles, pinpointing the location of the leak for repair.
Frequently Asked Questions (FAQ)
Can I use the FlexTail Tiny Pump 3X to inflate bicycle or car tires?
No, you cannot use this micro-pump to inflate bicycle or car tires. Tires require high-pressure inflation systems capable of reaching high PSI levels, whereas this device is designed strictly for high-volume, low-pressure items like camping pads and pool toys. Attempting to use it on tires can damage the motor and will not inflate the tire. Always check the maximum pressure rating on the device label to confirm compatibility.
How do I know when to stop inflating to avoid bursting the item?
To avoid over-inflation, rely on physical tension tests rather than a timer. Press your hand against the inflatable periodically during the process; the material should feel firm but still have a small amount of give when pressed firmly. Always refer to the gear manufacturer’s guidelines for recommended firmness, and avoid inflating items to a point where the seams look strained or pulled tight.
Community discussion
Share your experience or ask a question. Comments are reviewed before publication.