
Finding the right mini velo bike size requires measuring three critical body dimensions: your inseam, torso length, and arm reach. Unlike standard bicycles, mini velos combine small wheels with unique frame geometries, meaning you cannot rely on your height alone or standard road bike charts. By taking precise physical measurements at home and comparing them to the manufacturer’s geometry chart, you can select a frame that ensures comfortable handling, efficient power transfer, and a safe standover height.
Understanding Mini Velo Geometry vs. Standard Bicycles
Mini velos are adult-sized bicycles built on small wheels, typically 20 inches in diameter. This design creates a highly maneuverable, compact ride that is exceptionally popular in urban environments like Singapore, where space in high-rise apartments and public transit is limited. However, the small wheel size fundamentally alters the frame’s geometry, lowering the bottom bracket and changing how the frame must be proportioned to accommodate adult riders.
Because the wheels are small, the frame’s top tube must sit lower to maintain a safe standover height, but the seat tube and head tube must extend further upward to position the saddle and handlebars at comfortable heights. This results in a compact frame triangle with a relatively short seat tube. Standard bicycle sizing charts, which rely heavily on seat tube length to determine frame size, will suggest a frame that is far too small if applied directly to a mini velo.
Products mentioned in this guide

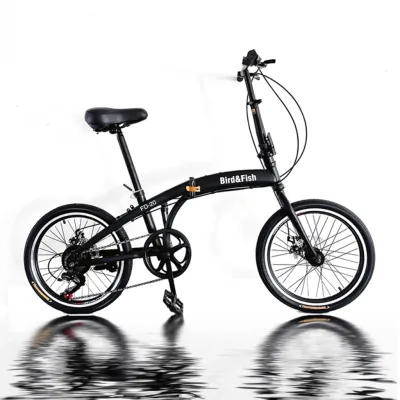
52 Lazada user ratings
Great value for money, highly recommended!, Sturdy build, feels durable., Love the stylish design, looks great!,
Great value for money, highly recommended!, Easy to assemble, hassle-free setup.,
Convenient and space-saving foldable design., Great bike for city commuting!,
Sturdy build, feels durable., High-quality Shimano gear system.,
Love the stylish design, looks great!,
Prices are valid at publication and may change. Please refer to the product page for the latest price.
Furthermore, the effective reach of a mini velo is highly dependent on the seat tube angle and the length of the top tube, rather than just the frame size label. The compact frame design means that the distance between the saddle and the handlebars (the cockpit) can feel cramped if you choose a size based solely on your height. To achieve a balanced riding position, you must look at the effective top tube length and stack measurements, which dictate how stretched out or upright you will feel while riding.
Tools and Preparation for Accurate Body Measurements
To obtain precise measurements that will translate accurately to a manufacturer’s geometry chart, you need to prepare your testing area and gather a few simple tools. Doing this carefully prevents minor errors that could lead to ordering an uncomfortable frame size.

You will need a flexible tape measure (preferably marked in centimeters for precise metric comparisons), a rigid hardcover book with a spine of at least two centimeters, and a helper to take the measurements while you stand in a natural posture. Attempting to measure yourself alone often leads to bending or twisting, which skews the results.
Wear the specific clothing and footwear you plan to use while cycling. If you ride in flat-soled sneakers or specialized cycling shoes, wear them during the measurement process, as sole thickness directly affects your standover clearance and saddle height. Find a flat, uncarpeted floor next to a vertical wall where you can stand flat and straight without sinking into a soft surface.
Step-by-Step Body Measurements for Mini Velo Sizing
Measuring Your Inseam for Standover Clearance
Your cycling inseam is the most critical measurement for determining whether you can safely stand over the bike’s top tube when stopped at a traffic light or crossing. This measurement is different from your trouser inseam, as it measures the distance from your pubic bone directly to the floor.
To measure your inseam, stand with your back flat against the wall and your feet about 15 to 20 centimeters apart, mimicking your stance while pedaling. Place the hardcover book between your legs and slide it up against the wall until it firmly mimics the upward pressure of a bicycle saddle.
Have your helper measure the distance from the top edge of the book’s spine straight down to the floor. Ensure the tape measure remains perfectly vertical and parallel to the wall. Record this measurement in centimeters, repeating the process twice to verify consistency.
Measuring Torso Length for Frame Reach
Torso length determines how long the front half of the bike’s frame needs to be to prevent you from feeling either too cramped or overly stretched. A well-fitted torso measurement ensures your weight is distributed evenly between the front and rear wheels.
To find your torso length, locate the C7 vertebra, which is the prominent bony bump at the base of your neck when you tilt your head forward. Stand upright against the wall with your shoulders relaxed and your heels touching the wall.
Have your helper measure from the C7 vertebra straight down to your hip bone (specifically the iliac crest). Keep the tape measure flat against your back, ensuring you do not slouch or over-extend your spine during the measurement. Record this value in centimeters.
Measuring Arm Reach for Handlebar Position
Your arm reach, combined with your torso length, dictates the total distance from your saddle to the handlebars, commonly referred to as the cockpit length. Correctly measuring this prevents neck, shoulder, and lower back strain during longer urban rides.
Extend your arm straight out in front of you at a 90-degree angle to your torso, with your hand closed into a loose fist. Have your helper measure from the outer edge of your collarbone (the acromion process) to the center of your fist.
Consider your personal flexibility and preferred riding style when evaluating this measurement. If you prefer a relaxed, upright commuter posture, you may want a shorter cockpit; if you prefer an aggressive, aerodynamic stance, a longer cockpit is necessary. This measurement helps you determine if a mini velo’s standard stem length will suit your reach.
Matching Your Measurements to Mini Velo Frame Dimensions
Once you have recorded your inseam, torso length, and arm reach, you can begin comparing these figures to the geometry charts provided by mini velo manufacturers. Because mini velos often come in fewer size options than standard road bikes—sometimes only one or two sizes—understanding how to read these charts is essential.
First, compare your inseam measurement to the published standover height of the frame. To ensure safe operation, especially when stopping frequently in urban traffic, you should have at least 2.5 to 5 centimeters of clearance between your groin and the top tube when standing flat-footed over the bike. If the standover height is equal to or greater than your inseam, the frame is too tall for you to ride safely.
Next, calculate your target cockpit length by adding your torso length and arm reach together, then dividing by a factor of two (a common starting point for recreational geometry). Compare this target to the effective top tube length listed on the geometry chart. The effective top tube is measured horizontally from the center of the head tube to the center of the seatpost, regardless of the physical slope of the tube.
Keep in mind that mini velos are designed with highly adjustable components to accommodate a wide range of rider heights on a single frame size. Long, telescopic seatposts and adjustable-angle stems are common features that allow you to customize the saddle height and handlebar reach. If your measurements fall between two sizes, choose the smaller size if you prefer a more agile, compact ride, or the larger size if you want greater stability and a longer wheelbase.
Fine-Tuning the Fit and Verifying Your Size Choice
After selecting a frame size, you can use the bike’s adjustable components to fine-tune the fit to your exact physical proportions. This step is crucial for preventing repetitive strain injuries and ensuring a comfortable ride.
Begin by adjusting the saddle height so that when your foot is at the bottom of the pedal stroke, your knee has a slight bend of approximately 85 to 90 percent extension. Next, adjust the saddle’s fore-aft position so that your knee sits directly over the pedal spindle when the crank arms are horizontal. This alignment optimizes power transfer and protects your knee joints.
Check for potential toe overlap, which occurs when your foot strikes the front wheel during tight turns. While mini velos have smaller wheels that reduce this risk, a compact frame can still bring your toes close to the tire. Ensure you have adequate clearance when wearing your typical cycling shoes.
If you experience persistent discomfort in your neck, shoulders, or lower back after making these adjustments, stop riding and consult a professional bike fitter or a local bike shop in Singapore. They can help you swap out components, such as installing a shorter stem or a handlebar with more rise, to perfectly adapt the mini velo to your body geometry.

Community discussion
Share your experience or ask a question. Comments are reviewed before publication.