
TRX resistance bands offer progressive tension levels across several product lines, including loop, strength, and therapy bands. These levels are distinguished by a color-coded system ranging from light yellow or green to heavy blue, black, or grey. Selecting the right band depends on your fitness level, the specific exercise, and your training environment. Understanding how to read these specifications and safely apply them ensures you get the most out of your strength training or rehabilitation routine.
Decoding TRX Resistance Band Specifications
TRX uses a color-coding system to help users quickly identify tension levels. However, because TRX offers different types of bands—such as thin latex loop bands for lower-body activation and thicker rubber strength bands—the exact color-to-tension mapping can vary. It is essential to verify the color chart against the specific product line’s official packaging or user manual.
Beyond color, look for official labels and tension markers. Many TRX bands feature printed weight equivalents or simple level indicators (such as Light, Medium, Heavy, and Extra Heavy) directly on the material. These weight equivalents represent the estimated force required to stretch the band to a specific percentage of its resting length, rather than a static weight like a dumbbell.
Products mentioned in this guide
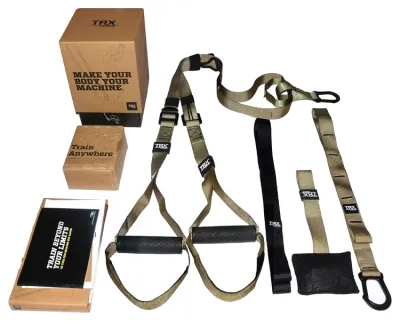
Prices are valid at publication and may change. Please refer to the product page for the latest price.
Physical differences are also highly observable. As tension increases, you will notice a distinct increase in the band’s thickness, width, or overall material density. Thicker bands require significantly more force to stretch, which alters how they behave during dynamic movements. Inspecting these physical dimensions helps you visually confirm the resistance level before starting a set.
Comparing Tension Levels Across Exercises
Light tension bands are highly versatile tools for preparation and recovery. They are ideal for dynamic warm-ups, physical therapy rehabilitation exercises, high-repetition muscular endurance work, and isolating smaller muscle groups like the rotator cuff. Because the resistance is low, they allow you to focus entirely on form and joint mobility without overloading stabilizing muscles.

Medium tension bands serve as the workhorse for general strength training and moderate hypertrophy. They provide enough resistance to challenge medium-sized muscle groups during movements like bicep curls, overhead presses, or lateral band walks. Additionally, medium bands offer a balanced level of assistance for compound movements, such as assisting with pull-ups when looped over a bar.
Heavy and extra-heavy tension bands are engineered for high-force applications. These bands are best suited for targeting large muscle groups, power training, or acting as a substitute for heavy free weights in exercises like squats, deadlifts, and chest presses. Because of the high tension, these bands require a stable base and excellent core control to manage the rapid snap-back force.
Stacking bands—using more than one band simultaneously—is a common method to customize your workout intensity. When stacking, the total resistance is roughly the sum of the individual bands’ tension at that specific stretch length. However, safety limits must be strictly observed. Ensure the bands are aligned perfectly parallel without twisting or rubbing against each other, as friction can cause premature wear or sudden snapping.
Matching Band Levels to Your Training Goals
To choose the correct starting band, you must assess your baseline strength relative to the target exercise. Consider your current lifting capacity with free weights or your body weight. For example, if you struggle with bodyweight pull-ups, a heavier band will provide more assistance, whereas a lighter band is appropriate if you only need a minor boost. Always start with a lighter band to master the movement pattern before progressing to higher tension.
It is also crucial to understand the resistance curve of elastic bands. Unlike free weights, which provide a constant gravitational resistance, band tension increases exponentially as the band is stretched. This means the resistance peaks at the end of your range of motion (such as the top of a squat). Keep this variable resistance in mind when selecting a level; a band that feels manageable at the start of a movement may become too difficult to control at full extension.
Progression does not always require switching to a heavier band. You can modify the effective tension of your current band by adjusting your grip width, changing your stance, or altering the distance from your anchor point. When these adjustments no longer provide a sufficient challenge throughout the entire range of motion, it is time to transition to the next official resistance level in the TRX lineup.
Safety Checks and Maintenance for Resistance Bands
Before every workout, perform a thorough pre-use inspection of your bands. Run your fingers along the material to check for micro-tears, small punctures, frayed edges, or areas of discoloration and stress whitening. Gently stretch the band slightly to see if any hidden cracks open up. If you notice any loss of elasticity or physical imperfections, do not use the band.
Anchor and connection safety is paramount to prevent high-velocity snapping. Ensure that any door anchors, poles, or structural beams you use are completely stable, smooth, and free of sharp edges that could cut the band. When using door anchors, always position them so you are pulling the door closed against the frame rather than pulling it open.
Establish clear retirement conditions for your equipment. A compromised band is a severe safety hazard and must be discarded immediately. Never attempt to repair a torn band, tie knots to bypass a damaged section, or reuse a degraded band for any exercise. Knots create concentrated stress points that are highly prone to slipping or snapping under tension.
Proper storage and cleaning will significantly extend the lifespan of your TRX bands. Clean them using a damp cloth with mild soap and water; avoid harsh chemical cleaners, alcohol, or solvents that can degrade the rubber or latex. Store the bands in a cool, dry place away from direct sunlight, extreme heat, and moisture, as UV rays and heat accelerate material breakdown.
Frequently Asked Questions (FAQ)
Can I use TRX resistance bands with the TRX Suspension Trainer?
Yes, certain TRX resistance bands can be integrated with the TRX Suspension Trainer, but you must follow official compatibility guidelines. Bands should only be attached using secure, designated connection points or handles designed to hold elastic bands. Never loop a band directly through the suspension straps in a way that creates metal-on-rubber or nylon-on-rubber friction, as this will quickly wear down both pieces of equipment. Always assess the combined tension carefully to maintain control over your body positioning.
How do I know if my TRX band has lost its original tension?
You can identify a degraded band by comparing its physical properties to a newer band or observing its behavior during use. If the band feels unusually soft, exhibits permanent deformation (such as remaining stretched out when relaxed), or has a slow, sluggish snap-back speed, the material has fatigued. Additionally, if the surface feels sticky, brittle, or powdery, the rubber is breaking down chemically, and the band must be retired immediately to prevent failure.
Community discussion
Share your experience or ask a question. Comments are reviewed before publication.