
Choosing the right Magicshine bike light for your rides in Singapore depends on where you ride, how long you stay on the saddle, and the specific lighting conditions of your route. Whether you are navigating the well-lit Park Connector Network (PCN), tackling dark off-road trails in Chestnut Nature Park, or embarking on overnight endurance loops around the island, your light must balance brightness, beam pattern, and battery life. Matching these factors to your specific cycling routine ensures you stay visible and safe without carrying unnecessary weight or blinding other path users.
Identifying Your Core Cycling Scenarios in Singapore
Before selecting a light, evaluate the typical surfaces and ambient light levels of your regular routes. Commuting along urban roads and the PCN presents very different lighting needs compared to riding unlit nature trails or gravel paths after dark. Well-lit areas require lights that make you visible to others, whereas unlit trails demand a powerful beam that illuminates obstacles directly in front of your tires.
Your typical ride duration determines the minimum battery capacity you need. For short daily commutes, a compact light with a built-in battery is often sufficient and easy to recharge via USB. For long-distance night rides, you will need to verify the manufacturer’s runtime specifications at your desired brightness setting to ensure the light does not fade before you finish your route.
Products mentioned in this guide
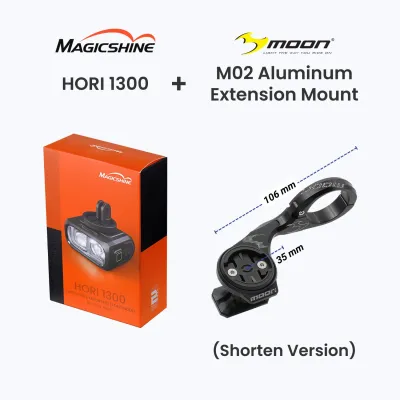
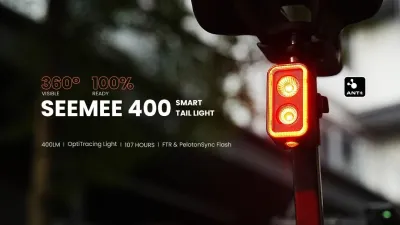
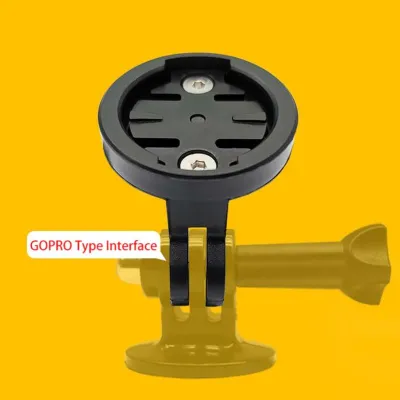
Prices are valid at publication and may change. Please refer to the product page for the latest price.
Singapore’s tropical climate means sudden downpours are common, making water resistance a critical factor. Check the manufacturer’s IPX water-resistance rating on the product packaging or manual before purchasing. A rating of IPX6 or higher is generally recommended to withstand heavy rain, ensuring the internal electronics remain protected during wet weather.
Selecting Lights for Urban Commuting and PCN Networks
When riding on shared paths like the PCN or busy urban roads, your light must help you navigate while remaining courteous to oncoming pedestrians and cyclists. High-powered, unfocused beams can easily blind others, creating safety hazards on narrow paths. Prioritizing lights with an anti-glare cut-off line helps direct the beam downward onto the pavement rather than upward into the eyes of oncoming traffic.

For these well-lit environments, moderate lumen outputs are usually sufficient to keep you visible. Look for models that offer a dedicated low-power or flashing daytime running mode to conserve battery while maintaining visibility. Side-visibility windows or amber side lights are also highly beneficial for staying noticeable at junctions and roundabouts.
Portability and ease of mounting are essential for daily commuters who leave their bikes parked in public spaces. Lightweight lights with quick-release mounts allow you to detach the unit in seconds and slip it into a bag. When browsing Magicshine’s commuter-focused options, check the product specifications for models featuring the Garmin-style base or quick-release strap mounts, which offer secure attachment and rapid removal.
Choosing Lights for Trail Riding and Off-Road Adventures
Off-road cycling on unlit trails requires a completely different lighting strategy, where seeing the terrain is your primary safety requirement. Technical trails feature unpredictable obstacles like exposed roots, loose rocks, and sudden drops that require a wide, deep beam pattern. A narrow beam can create tunnel vision, making it difficult to spot upcoming turns or low-hanging branches.
For trail riding, look for high-output models that can illuminate the entire width of the path. Because rough terrain subjects your equipment to constant vibrations and occasional impacts, verify that the light features a robust aluminum alloy housing and a secure mounting system. A loose mount can cause the beam to bounce violently, reducing visibility and potentially damaging the light.
A dual-light setup is highly recommended for night trail riding, combining a handlebar-mounted light with a helmet-mounted light. The handlebar light provides a stable, low-angle beam that casts shadows over obstacles, while the helmet light illuminates wherever you look, helping you see around tight corners. When selecting trail models, check the manufacturer’s compatibility list for dedicated helmet mounts and remote switch options to control brightness without taking your hands off the grips.
Equipping for Long-Distance and Endurance Road Cycling
Endurance cyclists embarking on overnight round-the-island rides need a reliable light source that balances high output with extended runtime. When riding for several hours through a mix of well-lit coastal roads and darker industrial sectors, battery management becomes your primary concern. Look for lights that feature high-capacity internal batteries or compatibility with external battery packs to ensure continuous operation.
Aerodynamics and weight distribution are also key considerations for drop-bar road bikes. Sleek, low-profile lights that mount cleanly underneath a cycling computer help keep your cockpit organized and reduce wind resistance. Check the mounting specifications to ensure the light can be positioned centrally on your handlebars or integrated into an out-front mount.
To maximize battery life during long rides, utilize adjustable brightness modes to match your surroundings. You can lower the output on well-lit stretches of road and increase it only when entering darker areas. Verify the manufacturer’s runtime charts to understand how different brightness levels affect battery drain, allowing you to plan your power usage effectively throughout the night.
Cross-Scenario Compatibility and Mounting Checks
If you participate in multiple types of cycling, you must decide whether a single versatile light can meet all your needs or if dedicated setups are required. A mid-range light with adjustable brightness and a quick-release mount can easily transition from a weekday commuter to a weekend road light. However, specialized activities like technical trail riding often require dedicated high-output units that may be too bulky or bright for daily commuting.
Before purchasing, verify the handlebar diameter compatibility of the included mounting brackets. Most lights come with adjustable straps or spacers to fit standard handlebar sizes, but oversized carbon bars or aero-shaped road bars may require specialized mounts. Check the clearance around your brake hoses, gear cables, and cycling computers to ensure the light can be mounted securely without interference.
Finally, consider the charging ecosystem of your devices. Lights that utilize standard USB-C charging ports allow you to use the same cables and power banks as your phone or cycling computer, simplifying your gear setup. Checking these physical and technical compatibilities beforehand ensures a seamless integration into your existing cycling routine.
Frequently Asked Questions (FAQ)
How do I maintain the water resistance of my Magicshine light during Singapore's rainy season?
To preserve the water resistance of your light, always ensure the rubber charging port cover is pressed firmly and completely sealed before every ride. After riding in the rain, wipe the exterior of the light dry with a soft cloth and allow it to air dry completely in a well-ventilated indoor area before opening the port cover or plugging it in to charge. Regularly inspect the rubber seals and port covers for any signs of cracking, tearing, or stretching, and contact the manufacturer or an authorized dealer if you notice any degradation that could compromise the seal.
Can I use a Magicshine mountain bike light for my daily PCN commute?
While a high-output mountain bike light will physically fit on your commuter bike, using it on shared paths like the PCN requires extreme caution. Trail lights typically feature wide, symmetrical beams designed to illuminate open spaces, which can easily blind oncoming cyclists and pedestrians even at lower brightness settings. If you must use a trail light for commuting, tilt the light downward significantly to keep the beam focused on the ground directly in front of your wheel, or use a lower brightness mode to avoid causing discomfort or safety hazards to other path users.

Community discussion
Share your experience or ask a question. Comments are reviewed before publication.