
Selecting the right resistance band level is the key to unlocking an effective, injury-free home workout. Rather than guessing based on color alone, finding your ideal tension requires matching your current physical strength with your specific training goals. Whether you are setting up a compact workout corner in a cozy apartment or looking to supplement your gym routine, understanding how to select and scale your resistance ensures you continue to make progress safely.
To make an accurate choice, you must evaluate your baseline fitness, decode the manufacturer’s specific tension ratings, and learn how to adjust the bands dynamically during your exercises. This guide provides a practical framework to help you choose the correct resistance level for your body and your workout routine.
Assess Your Fitness Baseline and Training Goals
Your ideal resistance level depends heavily on what you want to achieve during your training sessions. If your primary focus is joint rehabilitation, physical therapy, or dynamic warm-ups, you should start with the lightest resistance level available. This low-tension approach allows you to focus entirely on joint tracking, muscle activation, and controlled movement patterns without overloading sensitive connective tissues.
Products mentioned in this guide
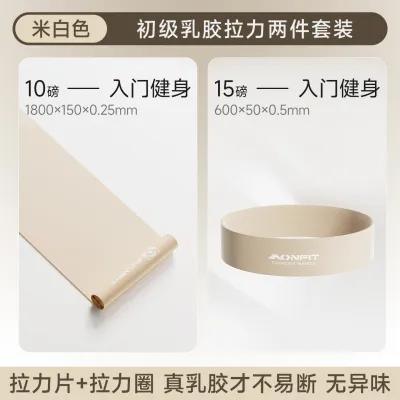
Prices are valid at publication and may change. Please refer to the product page for the latest price.
For muscle endurance and high-repetition conditioning, a light-to-medium band is generally the most appropriate choice. This level of tension allows you to maintain proper form over high-repetition sets of fifteen to twenty reps, which is ideal for cardiovascular conditioning and muscular stamina.
If your goal is hypertrophy or building raw strength, you will need to select heavy or extra-heavy bands. These levels provide enough mechanical tension to challenge your muscles within the classic eight to twelve repetition range, stimulating muscle fiber growth and strength adaptation.
To evaluate your baseline strength, use simple bodyweight benchmarks. If you can easily perform twenty controlled bodyweight squats or ten clean push-ups, you have the foundational strength to start with a medium or heavy band for those muscle groups. If you struggle with basic bodyweight movements, begin with a light band to assist your movement or provide a gentle, manageable load.
Always prioritize joint health and physical limitations when starting a new routine. If you have a history of shoulder discomfort or knee issues, starting with a highly conservative resistance level allows you to test your range of motion safely before gradually increasing the tension.
Decode OneTwoFit Resistance Band Specifications
It is a common mistake to assume that resistance band colors are standardized across the fitness industry. A red band from one manufacturer might offer a completely different tension range than a red band from another. To avoid training errors, always check the product packaging, tags, or official user manuals for the exact resistance ratings, which are typically printed in pounds or kilograms.

You must also understand the structural differences between the various types of bands available. Loop bands are continuous elastic circles, which are highly effective for lower-body activation, lateral band walks, and adding resistance to squats. Tube bands feature plastic handles and metal carabiners, making them excellent for mimicking cable machine exercises like chest presses, bicep curls, and lat pulldowns. Flat therapy bands are wide, open-ended strips of latex designed for slow, controlled stretching and physical therapy.
Each of these band types behaves differently under tension, so you cannot directly compare the feel of a twenty-pound loop band to a twenty-pound tube band. The tube band often feels more progressive, while the loop band provides a more immediate, snappy resistance.
Finally, always verify the maximum stretch limit specified by the manufacturer. Most high-quality latex bands are designed to stretch up to two or three times their resting length. Exceeding this limit not only risks damaging the structural integrity of the elastic material but also increases the likelihood of a sudden, dangerous snap during use.
Match Resistance Levels to Your Specific Exercises
Your body is made up of muscle groups of vastly different sizes and mechanical advantages, meaning a single resistance band level cannot suit your entire workout. Large, powerful muscle groups involved in compound movements require significantly heavier resistance to stimulate adaptation. For exercises like squats, deadlifts, or glute bridges, you will generally need to use your heaviest bands to feel a sufficient challenge.
Conversely, smaller, isolated muscle groups cannot safely handle heavy loads. For exercises targeting the shoulders, rotator cuffs, or triceps—such as lateral raises, face pulls, or overhead extensions—always select a light or extra-light band. Using a band that is too heavy for these delicate areas forces your body to compensate by shrugging your shoulders or arching your lower back, which can lead to strain.
You must also adapt your resistance selection when transitioning from bilateral movements to unilateral movements. A band tension that feels perfectly manageable when using both arms for a standing row will suddenly feel twice as heavy if you attempt a single-arm row.
When performing unilateral exercises, drop down to a lighter band or adjust your physical distance from the anchor point. This adjustment ensures you can maintain a stable torso, prevent twisting, and keep your shoulders level throughout the entire movement.
Recognize Signs You Need to Adjust Your Resistance
Paying close attention to physical feedback during your workout is essential for determining whether your current band level is appropriate. If you notice your form breaking down, find yourself using momentum to jerk the band, or feel joint strain rather than muscle fatigue, your resistance is too heavy. Failing to complete your target repetition range with a full, controlled range of motion is a clear sign to drop to a lighter band.
Conversely, you can easily identify when a resistance level is too light. If you complete your entire set without feeling any muscular fatigue or burn in the target muscle, the band is not providing enough tension. Another sign of insufficient resistance is the inability to control the eccentric, or releasing, phase of the exercise, causing the band to snap your limbs back into the starting position.
Fortunately, you do not always have to stop your workout to change bands; you can make quick micro-adjustments to fine-tune the tension. For loop bands, simply widening your stance or placing the band higher up on your thighs can instantly increase the resistance.
For tube bands, you can choke up on the elastic material or step further away from your anchor point to reduce slack. These simple physical adjustments allow you to customize the resistance level on the fly to match your exact strength capacity for that set.
Perform Essential Safety and Maintenance Checks
Because resistance bands store a high amount of kinetic energy under tension, establishing a strict pre-workout safety routine is vital. Before every training session, perform a thorough visual and tactile inspection of your bands. Run your fingers along the entire length of the material, stretching it slightly to check for micro-tears, small punctures, discoloration, or sticky patches. If you detect any signs of material degradation, discard the band immediately to prevent it from snapping mid-exercise.
When setting up your workout space, always select secure, non-abrasive anchor points. Avoid wrapping your bands around sharp metal brackets, rough wooden posts, or door hinges that can cut or wear down the elastic material. If you are using a door anchor, ensure it is placed on the side of the door that pulls shut against the frame, and lock the door if possible to prevent anyone from opening it while you are training.
Environmental factors play a major role in the lifespan of your fitness equipment. In warm, humid climates, natural latex can degrade, dry out, or become sticky much faster than in dry environments. Store your resistance bands in a cool, dry place away from direct sunlight and heat sources. To prevent the latex from sticking together and cracking, you can occasionally apply a light dusting of unscented talcum powder or cornstarch to the bands after cleaning them with a damp cloth.
Frequently Asked Questions (FAQ)
Can I combine multiple OneTwoFit bands to increase resistance?
Yes, many tube band sets are designed with modular carabiners that allow you to clip multiple bands onto a single pair of handles to stack the resistance. However, you must always verify this capability in your specific product manual before attempting to combine them. When stacking bands, ensure they are of similar lengths and materials to maintain an even tension distribution. Avoid mixing highly elastic flat bands with stiff tube bands, as this uneven tension can cause one band to overload and snap.
How do I know when it is time to replace my resistance bands?
You should replace your resistance bands immediately if you observe irreversible signs of wear, such as permanent stretching where the band remains loose at rest, visible cracks, peeling layers, or a complete loss of elasticity. Even if there is no obvious physical damage, the lifespan of elastic bands is limited by material fatigue. For regular home training, it is a safe practice to replace your frequently used latex bands every one to two years to ensure consistent tension and prevent sudden breakage.
Community discussion
Share your experience or ask a question. Comments are reviewed before publication.