
Selecting the ideal ULAC bicycle bag depends on your specific riding style, the distance of your journeys, and how you prefer your bicycle to handle under load. For daily urban commuters navigating busy streets, a frame bag offers a highly stable, centered storage solution that keeps weight low and essentials within arm’s reach. Recreational riders enjoying casual weekend cruises along the Park Connector Network (PCN) typically benefit most from a compact saddle bag, which keeps the main frame clear and holds essential roadside repair tools out of the way. Meanwhile, long-distance tourers and bikepackers requiring maximum storage volume for bulky gear will find a handlebar roll to be the most practical choice. By evaluating your typical cargo, frame geometry, and riding environment, you can select a configuration that enhances your cycling experience without compromising safety or bicycle performance.
How to Match Your Cycling Style to the Right Bag Type
To determine which bag type fits your needs, you must first analyze your primary cycling activities and the volume of gear you intend to carry. A daily commute to an office or school requires quick access to personal items like keys, mobile phones, and wallets, where ease of retrieval is paramount. Conversely, recreational riding along scenic paths like the PCN demands minimal gear—usually just basic maintenance tools and a spare tube to handle unexpected punctures. Long-distance touring or multi-day bikepacking trips introduce entirely different requirements, demanding substantial storage capacity for extra clothing, food, and lightweight shelter.
Weight distribution plays a critical role in how your bicycle behaves on different surfaces. Mounting heavy items high or far forward can significantly alter your steering dynamics, making the front end feel sluggish or overly sensitive. Placing weight in the center of the bicycle, specifically within the frame triangle, maintains a low center of gravity and preserves the natural handling characteristics of the frame. Rear-mounted storage, such as a saddle bag, keeps the weight behind your body, which minimizes aerodynamic drag but can cause the rear of the bike to sway during out-of-saddle climbing if not secured tightly.
Products mentioned in this guide
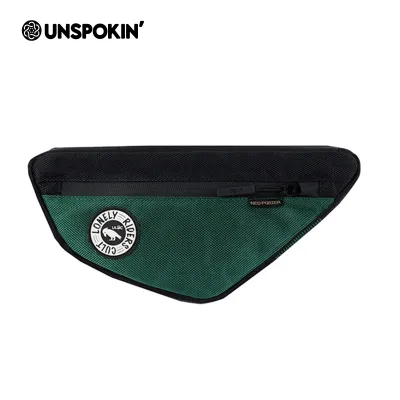
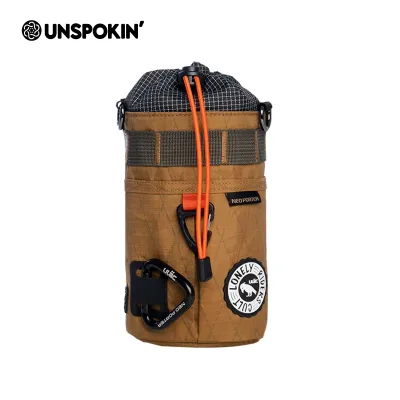
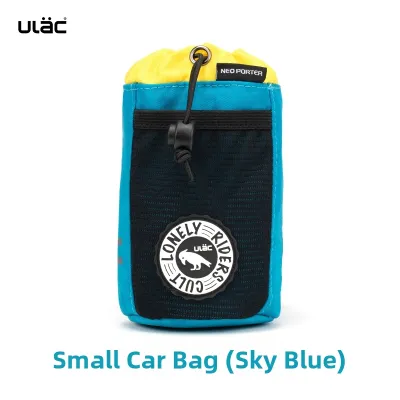
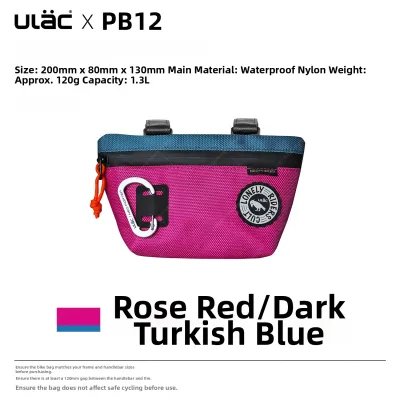
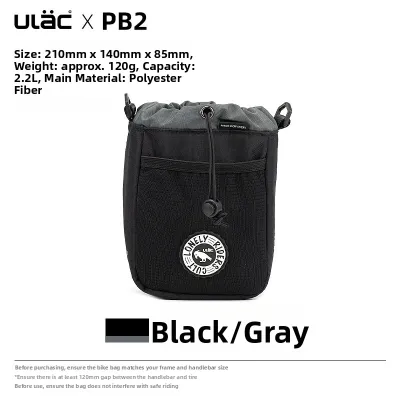
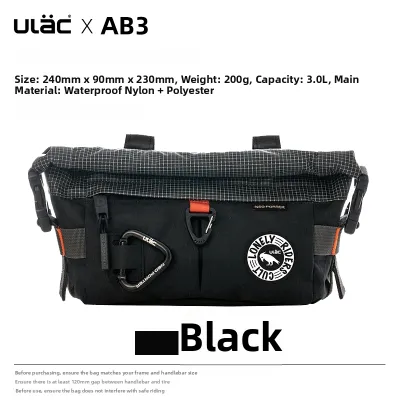
Prices are valid at publication and may change. Please refer to the product page for the latest price.
The total volume of your daily carry dictates whether you should opt for a minimal, balanced, or expedition-style setup. Minimalist setups rely on small under-seat bags that carry only what is necessary to get you home in an emergency. Balanced setups often combine a frame bag with a small handlebar bag to distribute weight evenly between the front and center of the frame. Expedition setups utilize large-capacity handlebar rolls and oversized seat packs to maximize carrying potential. Understanding these dynamics helps you avoid overloading your bicycle, ensuring a safer and more comfortable ride.
Frame Bags: Best for Commuting and Quick Access
Frame bags are designed to fit snugly within the main triangle of your bicycle frame, utilizing the empty space between the top tube, down tube, and seat tube. This central mounting position is highly advantageous for urban commuting because it keeps the weight of your cargo perfectly centered. When navigating tight traffic lanes, pedestrian crossings, or sudden stops, having a stable center of gravity ensures that your bicycle handles predictably. Unlike front-heavy handlebar bags or rear-heavy saddle bags, a frame bag minimizes lateral sway, allowing you to maintain balance and control even when carrying heavier items.

The interior of a frame bag is highly accessible, making it the ideal storage location for items you may need to retrieve quickly during a brief stop. Smartphones, wallets, keys, energy bars, and lightweight multi-tools can be organized and reached without needing to dismount or unpack your entire gear setup. Many riders find this convenience invaluable during daily commutes, where stopping to rummage through a deep backpack or rear pannier is impractical.
However, frame bags do present physical limitations that you must verify before purchasing. The most significant constraint is frame geometry; compact frames, full-suspension mountain bikes, and step-through frames often have limited space within the main triangle. Additionally, a frame bag can obstruct access to your water bottle cages, potentially forcing you to use side-loading cages or relocate your hydration setup entirely. You must also check that the mounting straps do not interfere with externally routed brake or derailleur cables, as pinching these cables can degrade shifting and braking performance.
Saddle Bags: Ideal for Minimalist and Recreational Rides
Saddle bags, which attach directly to the saddle rails and seat post, are the traditional choice for riders who prefer a clean, minimalist aesthetic. For casual recreational rides along the PCN, keeping the main frame triangle and handlebars free of luggage allows for a lighter, more agile cycling experience. Because these bags sit tucked behind your thighs, they are completely out of your line of sight and do not interfere with your pedaling motion, provided they are sized and mounted correctly.
The primary purpose of a saddle bag is to house essential roadside repair equipment that you hope you will not need but must carry for peace of mind. Typical contents include a spare inner tube, tire levers, a compact patch kit, a CO2 inflator, and a small multi-tool. By keeping these emergency items permanently packed in a saddle bag, you ensure they are always on the bike, freeing up your jersey pockets or daily backpack for other personal items.
Despite their convenience, saddle bags require careful compatibility checks. You must ensure that your seat post has sufficient exposed length to accommodate the bag’s attachment strap without sliding down or damaging the post material, which is particularly critical for carbon fiber seat posts. Furthermore, oversized saddle bags can sway laterally if not tensioned properly, which can be distracting during high-cadence pedaling. Finally, you must verify that the bag does not block your rear safety light; many saddle bags feature dedicated light attachment loops, which you should utilize to maintain visibility in low-light conditions.
Handlebar Rolls: Built for Touring and Bulky Gear
Handlebar rolls are cylindrical bags that secure directly to your handlebars, making them the go-to choice for carrying bulky, lightweight gear over long distances. When planning a multi-day tour or a bikepacking adventure, you often need to transport items that are too large or awkwardly shaped to fit inside a standard frame or saddle bag. Handlebar rolls excel at holding sleeping bags, compact tents, inflatable sleeping pads, or extra layers of clothing that can be compressed tightly.
Because a handlebar roll places weight directly over the front wheel, it has a noticeable impact on steering and handling. A heavily loaded front end requires more steering effort and can make low-speed maneuverability feel sluggish. To maintain safe control of your bicycle, it is essential to pack only lightweight, highly compressible items in this position, reserving heavier tools and liquids for the frame bag. Understanding how your bicycle handles with a loaded front end is crucial, especially when transitioning from paved paths to gravel or uneven dirt roads.
Before installing a handlebar roll, you must perform several critical clearance checks. Ensure there is adequate vertical clearance between the bottom of the bag and the top of your front tire or suspension fork to prevent rubbing, which can damage the bag or cause a sudden stop. You must also verify that the bag does not pinch or excessively bend your brake and shifter cables, as this can severely compromise your control. Drop-bar road and gravel bikes require extra care, as the width of the handlebar roll must fit comfortably between the brake hoods without interfering with your ability to shift gears or grip the bars securely.
Quick Comparison: Frame vs. Saddle vs. Handlebar Bags
To help you decide which configuration best suits your immediate needs, the following table summarizes the key characteristics, ideal use cases, and primary installation considerations for each of the three main ULAC bag categories.
| Bag Type | Best Riding Style | Ideal Gear Types | Weight Distribution Impact | Primary Installation Checks |
|---|---|---|---|---|
| Frame Bag | Commuting & Gravel | Phones, keys, wallets, tools, snacks | Centered and low; minimal impact on handling | Frame triangle dimensions, bottle cage clearance, cable routing |
| Saddle Bag | Recreational & Road | Inner tubes, tire levers, CO2, multi-tools | Rear-mounted; minimal drag, potential lateral sway | Seat post clearance, saddle rail space, rear light visibility |
| Handlebar Roll | Bikepacking & Touring | Sleeping gear, clothing, lightweight tents | Front-heavy; slows steering, requires balanced packing | Tire clearance, cable routing, handlebar width between hoods |
Choosing between these options often involves trade-offs. A frame bag offers a highly stable ride but sacrifices water bottle space. A saddle bag keeps your bike agile but limits your carrying capacity to the bare essentials. A handlebar roll provides massive volume for long trips but requires careful packing to avoid affecting your steering. Many experienced cyclists find that combining smaller versions of these bags provides the most versatile setup for varied riding conditions.
Essential Checks Before Buying Your ULAC Bag
Before purchasing any ULAC bicycle bag, taking precise measurements of your bicycle is the most effective way to ensure a secure and functional fit. Do not rely solely on visual estimates; use a flexible measuring tape to determine the exact length of your top tube’s underside, the height of your seat post, and the clearance between your handlebars and front tire. Compare these measurements directly against the physical dimensions listed on the product packaging or the manufacturer’s official specifications. A bag that is too large can rub against your legs or tires, while a bag that is too small may shift during transit.
Next, examine the material composition and water resistance ratings of the specific bag model you are considering. In tropical climates like Singapore, sudden downpours are common, making water-resistant or fully waterproof materials highly desirable. Check the product label to verify if the bag features welded seams, water-resistant zippers, or a roll-top closure system. Additionally, review the manufacturer’s care instructions; some materials require specific cleaning methods to preserve their water-resistant coatings over time.
Finally, always confirm current stock availability, warranty terms, and exact pricing in S$ directly from authorized local retailers or the brand’s official online store. Purchasing from authorized channels ensures that you receive a genuine product backed by the manufacturer’s warranty, protecting you against defects in materials or workmanship. Taking the time to verify these details before buying prevents compatibility issues and ensures your gear performs reliably on every ride.
Frequently Asked Questions (FAQ)
Can I combine different ULAC bags on the same bike?
Yes, combining different bag types is an excellent way to distribute weight evenly and increase your overall carrying capacity for longer journeys. When mixing bags, place your heaviest items—such as tools, spare parts, and dense food items—inside the frame bag to keep the center of gravity low and stable. Lighter, bulkier items like spare clothing should go into a handlebar roll, while emergency repair kits remain tucked away in a small saddle bag. Before setting off, always check for physical interference between the mounting straps of different bags. Ensure that straps do not overlap in a way that pinches your cables, blocks your lights, or rubs against moving components like the wheels or chain.
How do I clean and maintain my bicycle bag after wet rides?
Proper maintenance is essential to prolonging the lifespan of your bicycle bag, especially after riding through wet weather or muddy trails. Start by completely emptying all compartments and shaking out any loose dirt or debris from the interior. Wipe down the exterior and interior surfaces using a soft, damp cloth and mild, soapy water if necessary. Avoid using harsh chemical solvents, bleach, or abrasive scrubbing brushes, as these can strip away the water-resistant coatings and damage the fabric. Never machine wash or tumble dry your bicycle bag unless the manufacturer’s care label explicitly states it is safe to do so. Instead, hang the bag open in a well-ventilated, shaded area and allow it to air dry completely before storing it away.
Community discussion
Share your experience or ask a question. Comments are reviewed before publication.